We can now start having the MQTTX act as the subscriber and publisher:
Download and install MQTTX from the official website at https://mqttx.app/.
Open MQTTX and click the + button in the top-left corner to create a new connection, as shown in Figure 3.9.
Configure the connection with the fields as shown in Figure 3.9:
- Name: Give your connection a name – for example, “ESP32_MQTT”. For the purposes of the demo, Figure 3.9 will use the name mosquitto instead.
- Protocol (Client ID): Select mqtt:// from the drop-down list.
- Host: Enter the IP address of your MQTT broker (in this practical, it’s 192.168.0.117).
- Port: Enter the port number of your MQTT broker (in this practical, it’s 1883).
- Username and Password: Leave these blank unless your MQTT broker requires authentication.
- Click Connect to establish a connection with the MQTT broker.
It would look like the following with these configurations:
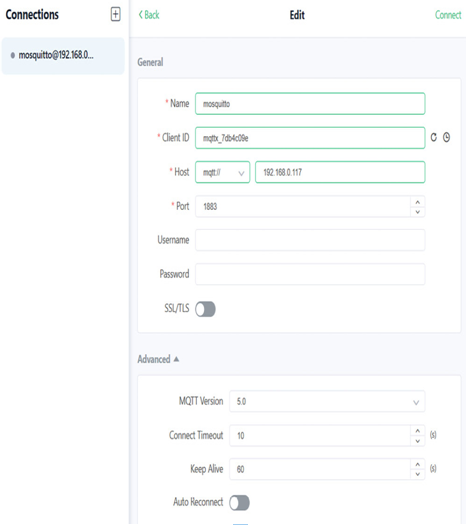
Figure 3.9 – Entering the information required for a new MQTT connection in MQTTX
Subscribe to topics:
- Click the + New Subscription button in the right pane:
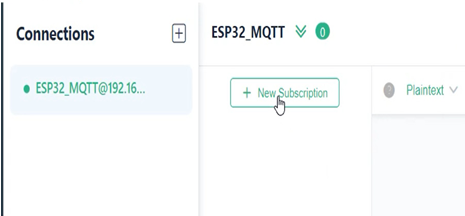
Figure 3.10 – Locating the New Subscription button in MQTTX
Enter the topic you want to subscribe to (e.g., /topic/test1 or /topic/test2).
Click the Confirm button in the bottom right to subscribe to the topic:
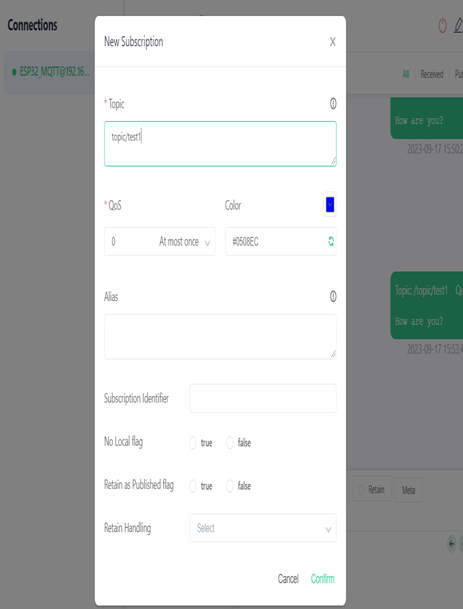
Figure 3.11 – Filling in the topic and clicking the Confirm button to subscribe to it
MQTTX will now listen for messages published to the subscribed topics, and they will appear in the messages panel as follows:
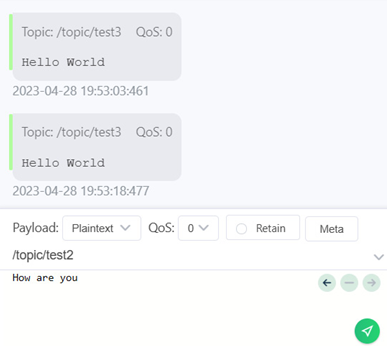
Figure 3.12 – Sample messages that will be shown from subscribing to a topic
Publish messages:
- Click the topic you want to publish to (e.g., “/topic/test1” or “/topic/test2”) on your subscriptions list:

Figure 3.13 – Selecting a topic to publish to and writing a message
Type your message into the Payload input field. This can be any message, such as Hello.
Click Publish, in the form of a white cursor in a green button in the bottom-right corner, to send the message to the MQTT broker, which will distribute it to all subscribers (including your ESP32) listening to that topic:
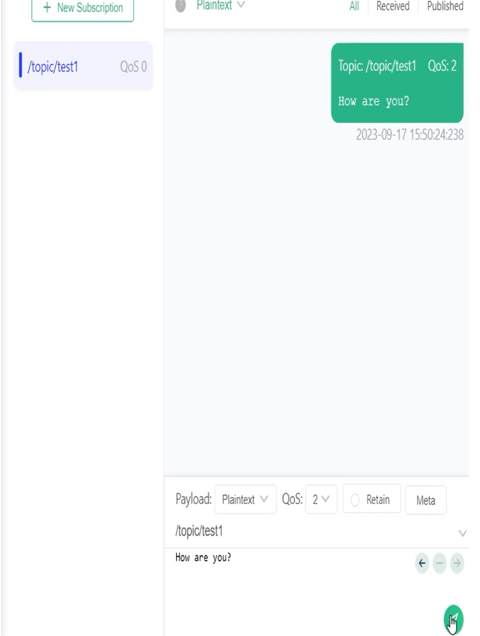
Figure 3.14 – Clicking the Publish button to publish the message to a topic
Open Serial Monitor from Tools | Serial Monitor and you will be able to see the output listed as follows:
WiFi connected
Message arrived [/topic/test1] Hello
You can also send a message from the Serial Monitor message box. You will see this on your /topic/test1 topic on MQTTX.
With these steps, you can use MQTTX to monitor messages sent by your ESP32 and send messages to your ESP32 as it subscribes to the specified topics. Additionally, you can send messages to MQTTX from your Serial Monitor.
The following is a list of MQTT events that need to be handled:
| MQTT_EVENT_CONNECTED | This event occurs when the client successfully establishes a connection with the broker, indicating that it is now capable of exchanging data with the broker. |
| MQTT_EVENT_DISCONNECTED | When the client is unable to connect to the server, or the connection is terminated for any reason, this event is triggered. The client will not be able to communicate with the broker in this state. |
| MQTT_EVENT_SUBSCRIBED | When the client sends a subscribe request to the broker, this event is triggered if the broker accepts it. The message ID associated with the subscribe message is also included in the event data. |
| MQTT_EVENT_UNSUBSCRIBED | This event is triggered when the broker accepts the unsubscribe request from the client. The message ID linked with the unsubscribe message is included in the event data. |
| MQTT_EVENT_PUBLISHED | When the broker acknowledges the publish message sent by the client, this event is triggered. The message ID associated with the publish message is included in the event data, but this event is only triggered for QoS level 1 or 2, since level 0 does not involve acknowledgments. |
| MQTT_EVENT_DATA | Whenever the client receives a publish message from the broker, this event is triggered, and the event data contains the message ID, topic name, received data, and length of the data. |
| MQTT_EVENT_ERROR | When the client experiences any error, this event is triggered. The client can then use the event data to troubleshoot the issue. |
Table 3.1 – Table of common MQTT events that need to be handled
And with that, you have a working ESP32-Raspberry Pi pub/sub model!